Braxton Perry I was there 63-65 and we had all "C" models
Model blog on military aircraft of all periods. Plus general history of aircraft.
Labels
- 127th
- 191st FIG
- 191st FIG History
- 191st FIG.
- a
- A-20 Havoc/Boston
- A-26 Invader
- A-3
- A-4
- A-6 Intrufers
- A-7 Corsair
- A/B-26 Invader
- ADF F-16's 191st Fig
- AIMS Conversions
- airliners
- AM-1 Mauler
- b
- B-17
- B-24 Liberator
- B-25
- B-26 Marauder
- B-47
- B-52
- B-57
- Barry Numerick
- BF-109
- Bf-110
- blogs
- BOH
- Boomerang
- C-118
- C-119
- C-124
- C-130
- C-133
- c-14
- C-47
- C-54
- C/KC-97
- C121/EC 121
- C47/DC3
- Chu Lai RVN
- cold war
- Convair 340/C-131
- curtiss buffalo plant
- DC-8
- decals
- f-100
- F-101 Voodoo
- F-102
- f-104
- F-106
- F-14
- F-15
- F-16
- F-18
- F-20
- F-4 Phantom
- F-4C history
- F-4C Six pack Phantoms
- F-4D
- f-5
- F-8 Crusader
- F-80
- F-84
- f-86
- F-86D
- F-89
- F3H Demon
- F4U Corsair
- FH2 Banshee
- Fury
- FW-190
- FW-190 all variants
- Gunze products
- Hawker Hurricane
- helicopter Vietnam
- i
- in memory of fellow modelers
- Ipms
- IPMS Cons & Nationals
- Japanese aircraft
- JU-87
- JU-88
- KC-135
- KC97-C97
- Keith Ferris Camo Schemes
- KI-61/100
- KMC correction sets
- Korean War
- m
- Meteor fighter.
- MIANG 107th TFS (127th TFG) A-7D
- MIANG aircraft
- MIANG F89C
- Michigan Cold War Nike site
- Mig-`15
- Mig-17
- Mig-19
- modeling memories
- modeling tips
- Mosquito
- my models
- Omaha 2022
- P-2 Neptune
- P-3 Orion
- P-38
- P-39
- P-40
- p-47
- P-51
- Photographing your Models
- Privateer
- RF-84F
- Sea Fury/ Tempest
- SixPack F-106
- spitfire
- t
- T-33
- TBF & TBM torpedo Bomber
- TBM
- Typhoon
- USAF Aces
- Vietnam
- VP93
- War Eagle
- wet decals
- Why didn't my model win?
- WW2 history
- Zero
Monday, June 24, 2019
Easy way to paint stripes on your bombs,
This tip is from Grant Barry.
Masking the yellow bands on bombs - you can buy sets of Orings, all different sizes and cheap. Just use the size that fits nicely on the size bomb you are doing. And they are reusable.
Sunday, June 23, 2019
How to strip you airplane by Frank Chenshaw
Here is a great video Frank Chenshaw. Easy why to strip off the meshed up paint job.
Stripping paint with precision is an important skill. It's actually pretty easy to remove Lacquer and Acrylic paint using Tamiya Lacquer thinner and q tips
Saturday, June 22, 2019
Privateer build part 4
Today he is working on the nose. After which the side blisters are gong to be installed next
Friday, June 21, 2019
P-51 Mustang info
The big debate over natural finished P-51. The image below shows what was painted. Plus natural metal areas on the air
frame.
 |
| Light grey area is where the putty was applied on the wings. |
Ak interactive new Real colors
Talk about some awesome paint. With testors model master having gone the way of the Do Do bird this is god sent. The paint pretty well matches the colors to the spec's. Her is the video better than me yaking about it.
Thursday, June 20, 2019
Pt 2 Amazing C-124 loadmaster and crew comments
 |
| Jim Stolfi It's a C model, Tachi birds all A models started with "1", example, 51-0119 was 1-0119. They were converted to Cs in mid '60s I understand. |
 |
| Khan Duc dirty airstrip Vietman |
Stories about the C-124.
Richard Jones Been there done that.
- Braxton Perry Jim Stolfi All had forward facing engineers panels. I looked at the SN wrong; that plane had side panel more than likely.
- Jim Stolfi Braxton Perry I was there '58 - '60. By the way, here is a pix of 51-0119 after the '79 tornado in Windsor Locks aka BDL........
Walter McCann I was with the “BullyBeef Express” C-124s in Tachi 1952/3
Stan Gross We hauled from peanuts to Tractors to Gasoline Tankers-to 40,000 lbs of Beer to English Troops in Jordan from Cyprus-Nothing to small or too Big-Right Woody??
Clair Repple 15 hour ground time Travis AFB 50k fuel Hickum next
John C Reppert It took 5 hours to properly load to 155 howitzers on a C124 in California and all of 15 minutes to unload then in Siagon.
- John C Reppert that should be two 155 howitzers not to, sorry
Monday, June 17, 2019
Scratch building a BF-109 canopy by Barry Numerick
A few tricks that some may find useful. A I mentioned, the canopy of the Tamiya 109 is rather thick. I was able to sand the inside on the rear section and polish it back up, but that proved impractical for the center section. I tried several different clear plastics from the stash and ended up using one of the less suitable, .015" Evergreen styrene. Butyrate would have been better, but I didn't have any at hand. Styrene tends to shatter or tear, but if you're careful, you can get acceptable results. Here's the first step. cutting the piece to the proper length and width, then gently scribing the centerline, which represents the individual panes.
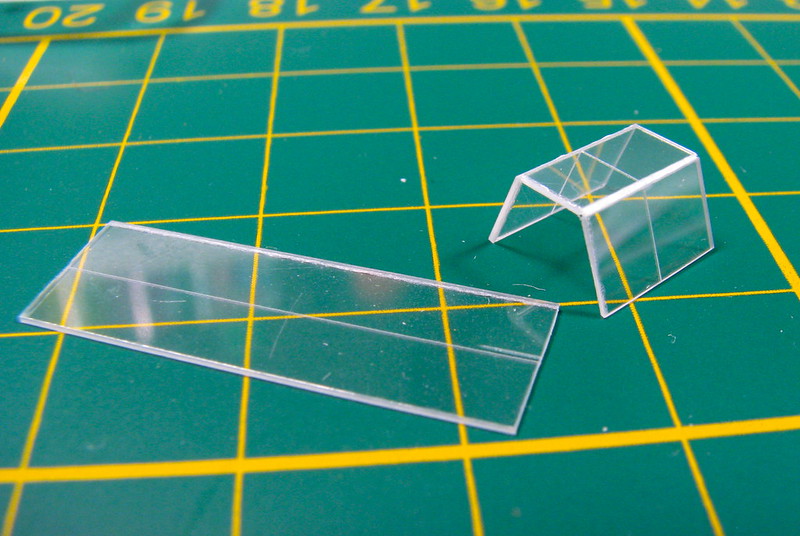 IMG_5986
Paint the edges with RLM 66. Don't worry about the ragged looking edges, they will be covered by decals cut into strips to represent frames.
 IMG_5995
I wanted to represent the bolts on the base strips at the bottom of the canopy. I the old days when I modeled in 1/48, these would be made from bits of stretched sprue, but that really isn't practical in 1/72. I stumbled across this idea while practicing with Radu Brinzan's riveter. I consider this to be the best riveter on the market because the wheel is photo-etched steel and makes a VERY small rivet. Run the riveter across .005" styrene, flip it over and you get a very nice impression of bolts.
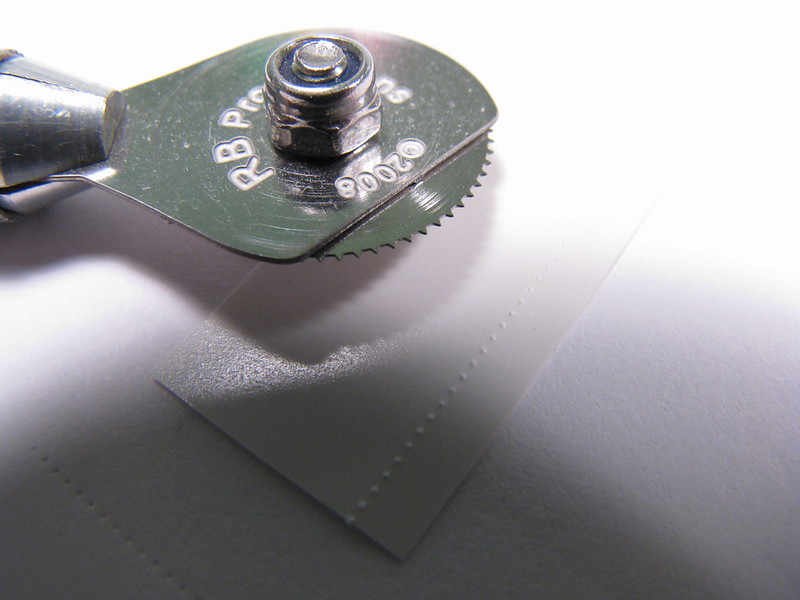 IMG_6039
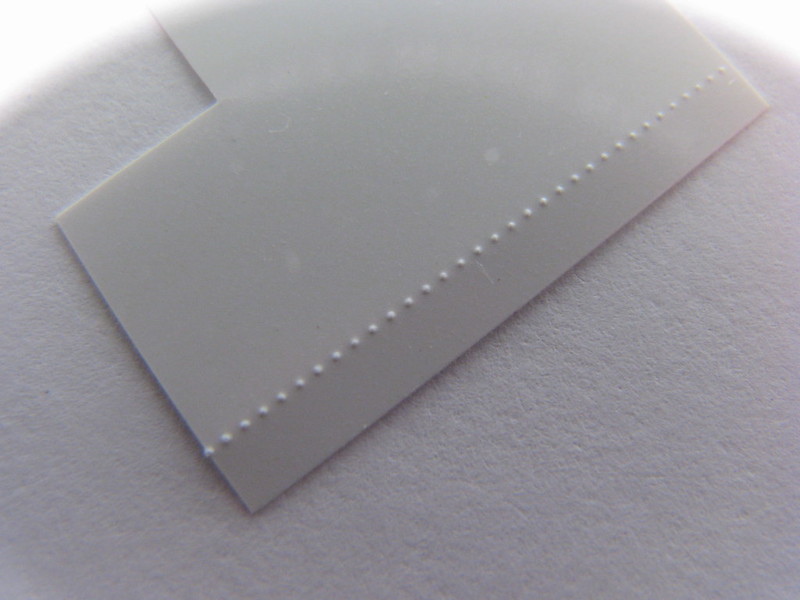 IMG_6030
Spray the interior color and drybrush with light grey oil paint. Also, emboss the rivets, then cut the strip. Doing the reverse will severely distort the strip. Before applying with white glue, paint the reverse side also. Otherwise the white plastic will be reflected through the panel.
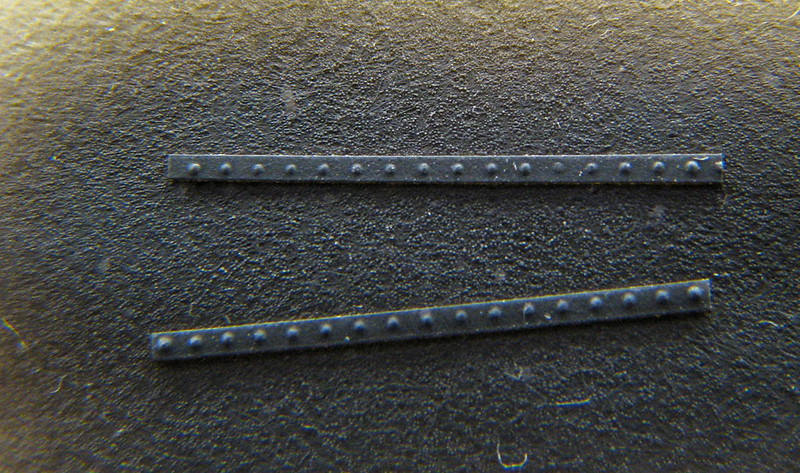 IMG_6024
Finally, I wanted to represent the locking lever on the side of the bottom frame. An easy way to represent a flat, curved piece it to curl stretched sprue, then flatted it with a pair of flat pliers. The knob is a bit of stretched sprue. The handle is then glued to a bent piece of .005" sheet, painted grey and again white glued the the frame.
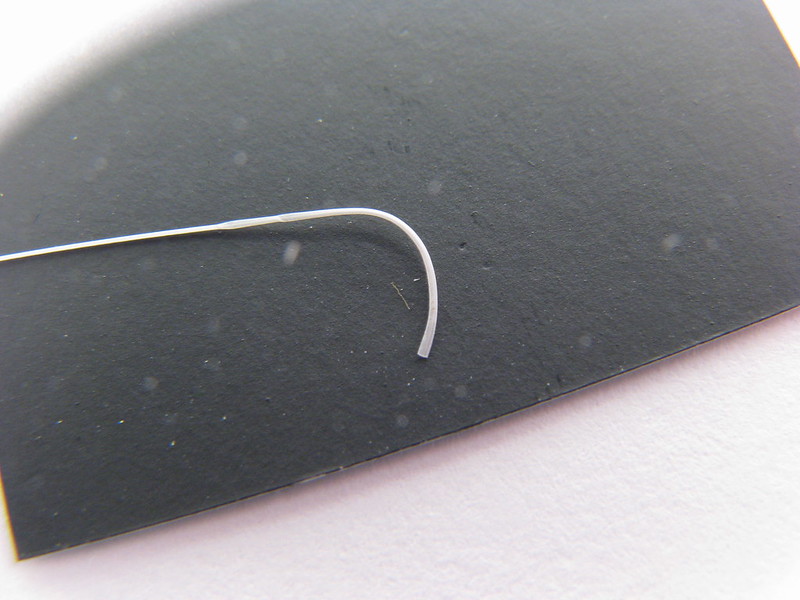 IMG_6036
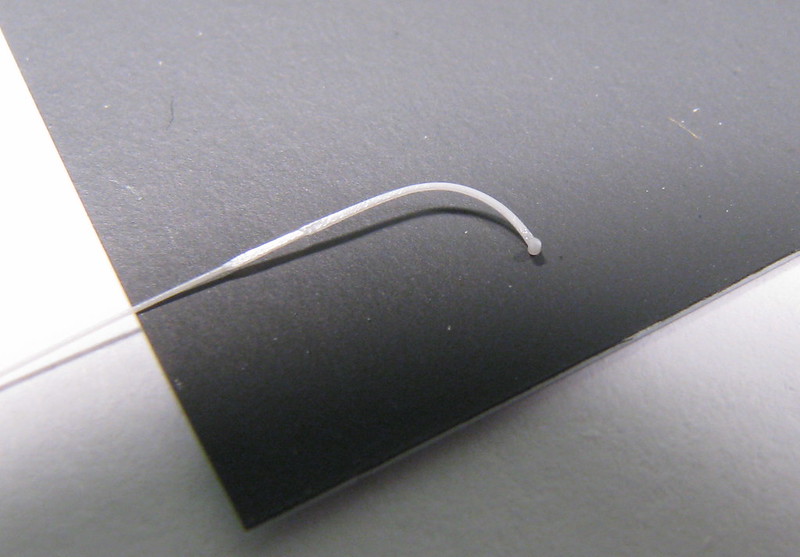 IMG_6040
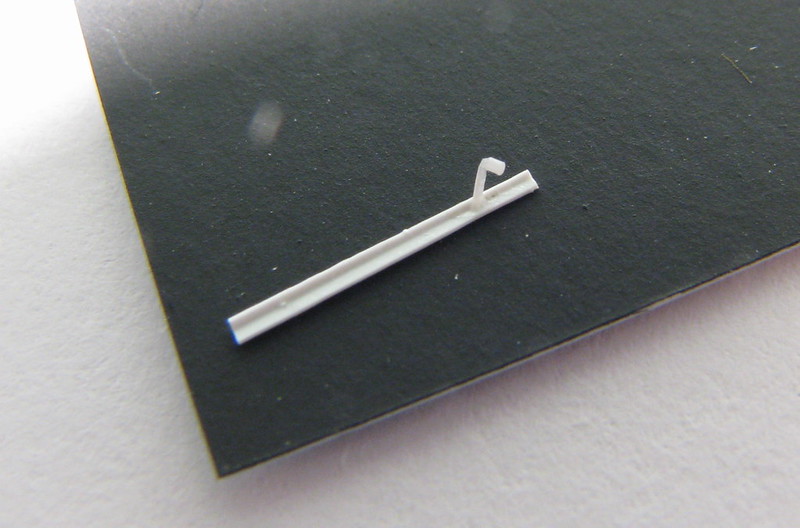 IMG_6041
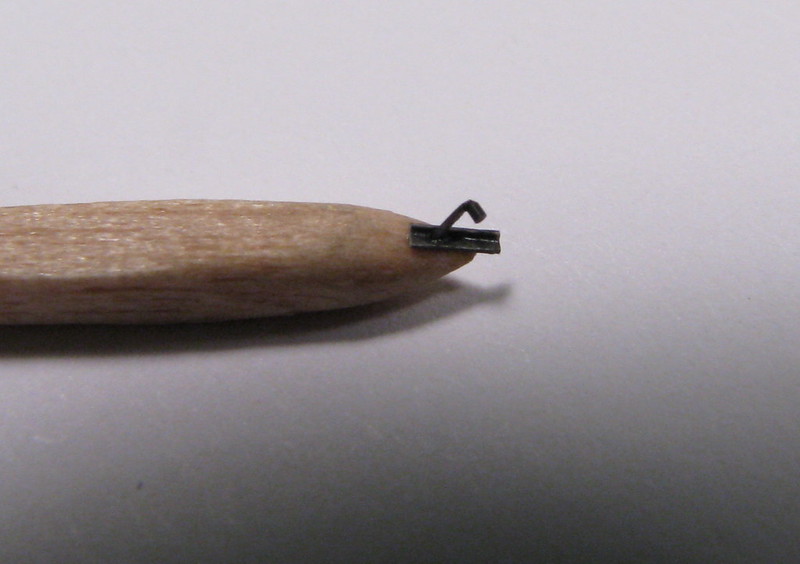 IMG_6043
Here's the nearly complete canopy. Next will be the small knobs on the forward panel and applying Hans Fay's finger prints on the knob. Just kidding about the fingerprints, I have no idea what they looked like.
 IMG_6044
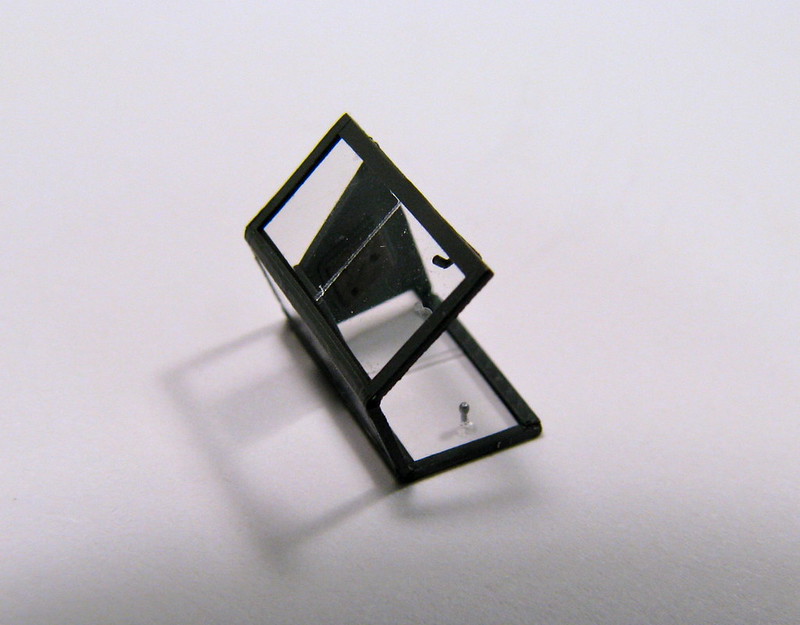
...made the little knobs tonight so I decided to add them to this segment. They are thin sprue dipped in white glue. After drying I further dipped them in Metalizer non-buffing aluminum. Then snipped them off and attached them with more white glue. They may be a bit big, but they're the smallest of the 10 or so that I made and its difficult to work with anything smaller.
 IMG_6050
 IMG_5986
 Paint the edges with RLM 66. Don't worry about the ragged looking edges, they will be covered by decals cut into strips to represent frames.
 IMG_5995
 I wanted to represent the bolts on the base strips at the bottom of the canopy. I the old days when I modeled in 1/48, these would be made from bits of stretched sprue, but that really isn't practical in 1/72. I stumbled across this idea while practicing with Radu Brinzan's riveter. I consider this to be the best riveter on the market because the wheel is photo-etched steel and makes a VERY small rivet. Run the riveter across .005" styrene, flip it over and you get a very nice impression of bolts.
 IMG_6039
  IMG_6030
 Spray the interior color and drybrush with light grey oil paint. Also, emboss the rivets, then cut the strip. Doing the reverse will severely distort the strip. Before applying with white glue, paint the reverse side also. Otherwise the white plastic will be reflected through the panel.
 IMG_6024
 Finally, I wanted to represent the locking lever on the side of the bottom frame. An easy way to represent a flat, curved piece it to curl stretched sprue, then flatted it with a pair of flat pliers. The knob is a bit of stretched sprue. The handle is then glued to a bent piece of .005" sheet, painted grey and again white glued the the frame.
 IMG_6036
  IMG_6040
  IMG_6041
  IMG_6043
 Here's the nearly complete canopy. Next will be the small knobs on the forward panel and applying Hans Fay's finger prints on the knob. Just kidding about the fingerprints, I have no idea what they looked like.
 IMG_6044
 ...made the little knobs tonight so I decided to add them to this segment. They are thin sprue dipped in white glue. After drying I further dipped them in Metalizer non-buffing aluminum. Then snipped them off and attached them with more white glue. They may be a bit big, but they're the smallest of the 10 or so that I made and its difficult to work with anything smaller.
 IMG_6050
Subscribe to:
Posts (Atom)


